How to disassemble or change the variator, clutch, belt, rollers on XMAX 125-250
First of all, you need to equip yourself with Easyboost tools kit, which are essential to dismantle the variation (CVT) of your XMAX. This tutorial will teach you how to easily disassemble or change the variator, belt, rollers or clutch of your XMAX 125 and 250cc with the innovative Easyboost tools. In fact, it is a matter of doing your own revision without having to go through the garage box.
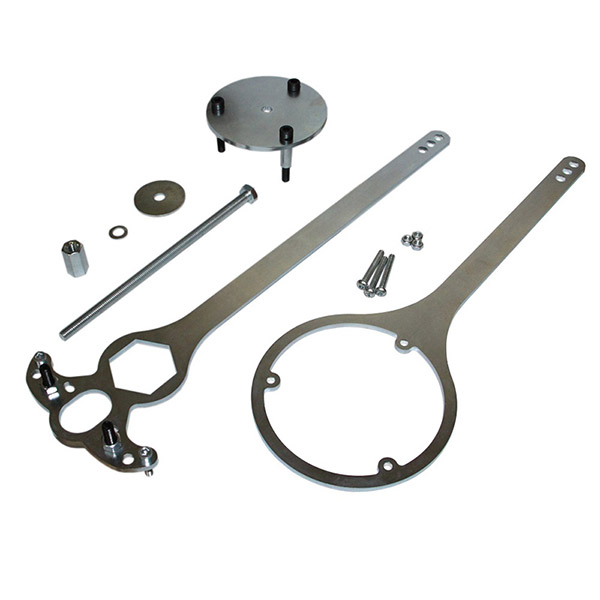
CONTENT OF THE TOOLING PACKAGE
- A multipurpose spanner to remove the clutch nut, the torque drive nut and the variator nut
- A compression turntable to remove the torque spring on the torque drive
- A special spanner to maintain the torque drive
- All the necessary nuts and screws
- An explanatory note
REMOVE THE VARIATOR
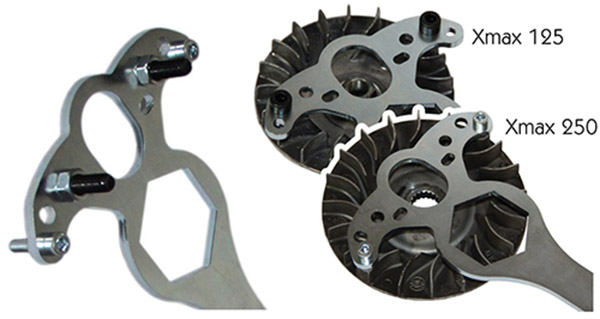
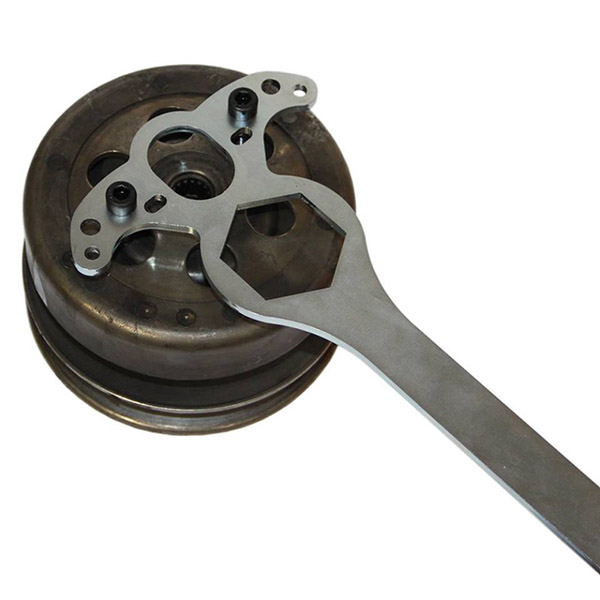
Place 2 screws and 2 nuts M8 on the multi-purpose wrench for Xmax 125 and 2 screws and 2 nuts M6 for Xmax 250 as shown in the pictures below. This configuration allows the variator to be locked to loosen the nut that holds it. For reassembly, tighten the nut to a torque of 55Nm on Xmax 125 and 80Nm on Xmax 250.
REMOVE THE CLUTCH BELL
Place 2 screws and 2 nuts M8 on the multi-purpose wrench. This configuration allows the clutch bell to be locked to loosen the nut that holds it. For reassembly, tighten the nut to a torque of 60 Nm (Xmax 125/250).
REMOVE THE TORQUE SPRING
1. Loosen the nut that holds the clutch on the torque drive by about 1/4 turn. To do this, use the locking tool to hold the clutch and the multi-purpose tool to loosen the nut.
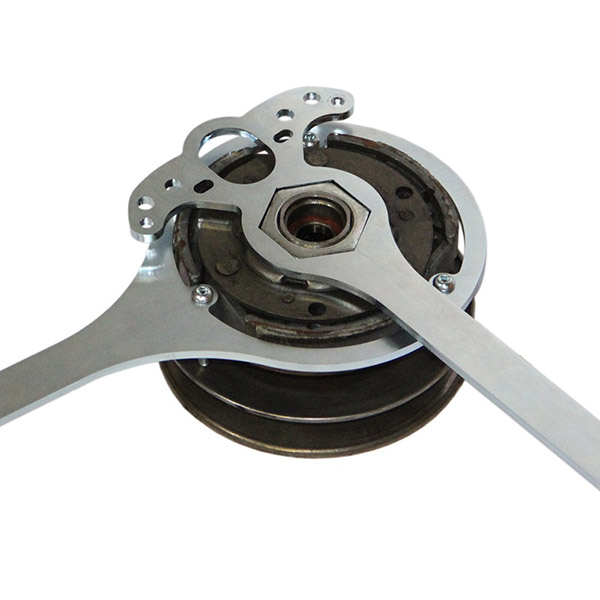
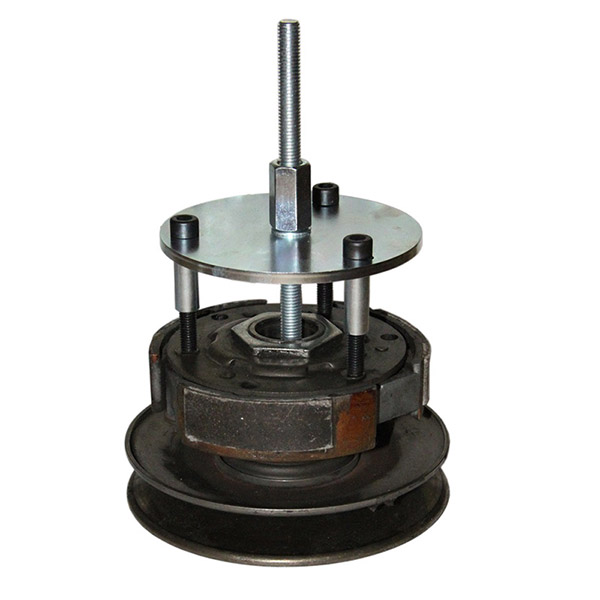
2. Position the plate and shaft according to the diagrams below to exert pressure on the clutch.
CAUTION, as the clutch is in the stop position, the spring will not compress. Now the nut must be able to be unscrewed by hand. Then simply unscrew the nut from the axle to gradually release the spring.
To reassemble, reverse the steps described above.
For more details, we invite you to watch the YouTube tutorial video produced by one of our customers:

